 Apprenticeships
 Construction
 Education Tech
 Engineering
 Franchise Networks
 Legal Firms
 Logistics
 MATs
MATs Recruitment
 Retail
 Seasonal Staff
FrogLMS Community
Accessing Files in Frog
This site will introduce you to different ways to access Files depending on how your organisation has chosen to set up FrogLMS,
- Files – Accessing your files in Frog Overview
- Files – Network Drives
- Files – Frog Shared Folders
- Files – Office 365
- Files – Google Drive


Files: Accessing your files in Frog Overview
Depending on how your school has chosen to set up Frog, there are different ways to access files from home and in school. This site will introduce you to each method:
- Accessing your network drives
- Accessing your personal drive
- Accessing Office365 / Google documents
Your Frog Coordinator can explain which method of file access your organisation is using.
Files: Network Drives
Depending how your Frog is set up, it may be that your school can provide access to all your personal documents and shared network drives via Frog. This allows you to be able to access these drives from outside school.
Network Drives
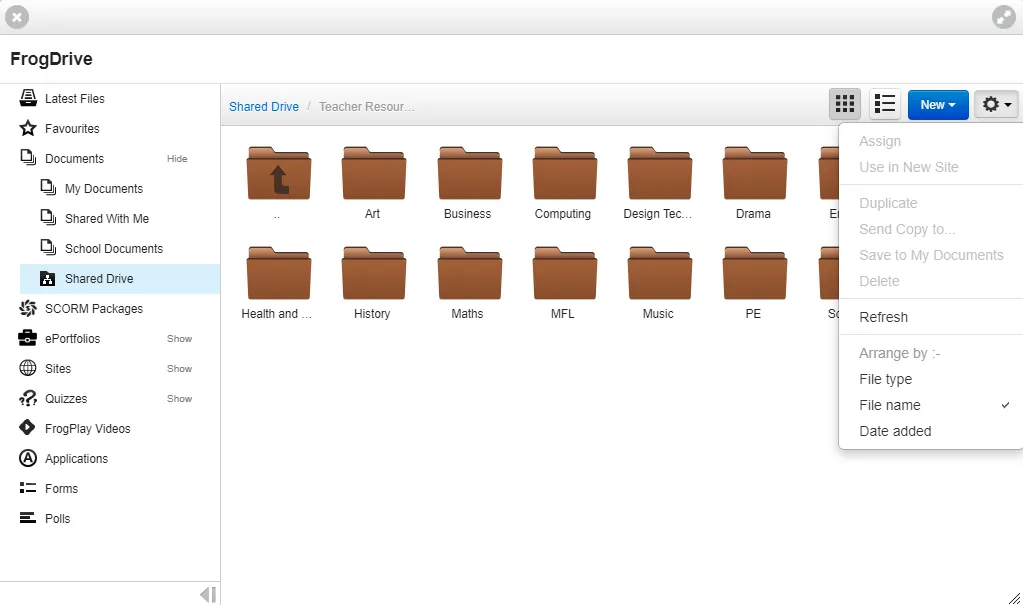
Network Drives appear within the Documents area of FrogDrive. You may need to enter your network username and password once or every time depending on your school's security policy.
Folders and Files
The folder and files on the school's network will appear here.
Action Cog menu
You can assign documents directly from here or embed them in new sites. You can also see these files from within the Link to File and Media widgets. Adding files to a site creates a copy of the file on the site. If you make changes to the network file, it will not upload on the site if linked via anythign other than the Network Drive widget.
Network Drive widget
![]()
Folders
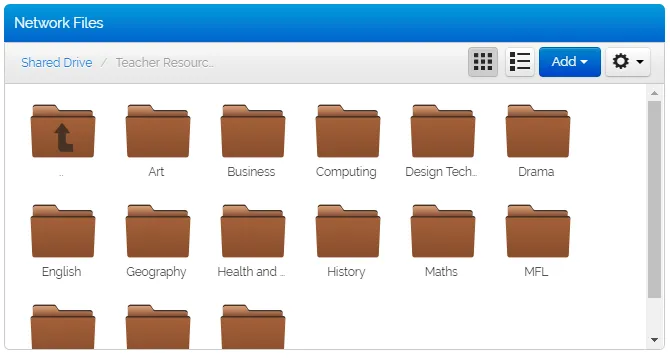
Folders and files which appear here are views onto your network drives. Any changes you make here or on the drive are directly linked.
Add
You can add files and folders from within Frog.
Action Cog
Using the options in the Action Cog menu, you can copy files, delete them or transfer them to your FrogDrive, ready to be assigned to students.
Files: Frog Shared Folders
A useful tool for displaying, interacting and sharing documents is the shared folder widget.
This widget does not store documents itself, but instead points to a folder in FrogDrive.
I cannot create a folder via the widget, so I first I need to set up a folder in FrogDrive, which I can access from the Quick Launch menu.
I find it’s best to create the folder, not in My Documents, but in School Documents. This keeps everything organised to a folder structure, which makes finding resources later much easier. This may seem confusing, but if you use the shared folder widget, nobody will notice.
I can only control sharing on one folder, not any subfolders. This means that if I want a set of resources for teachers in my department, but I want to share some resources with students, I’ll need to create two department folders.
In my example, I already have some folders set up, called Student Resources and Teacher resources. I’m going to share the student resources with students and staff profiles, by:
- Single clicking to highlight the folder
- Clicking on the Action Cog
- Choosing Share
- In the pop-up, I can now type in individuals or groups or profiles. In this case, I’m going to add students and staff, so I’ll type ‘student’
- Frog then searches for any groups, users or profiles called student. I’m going to click on profile: student
- Now, just like site sharing, I can set the access. I only want students to be able to view the contents of the folders, not add or alter, so I’ll leave it as view only
- I’ll repeat the process to add teachers by typing ‘staff’, but this time, I’ll give the staff profile edit and manage rights
It’s worth noting, any folders or files inside a shared folder inherit the permissions of that folder and cannot be changed, unless you move them out of that shared folder.
Once the sharing is sorted, I can add the widget to a site.
- In the editing panel, I then click the Choose a Folder button.
- FrogDrive opens and I navigate to my shared folder, single-click to select it and then click the Use button.
As you can see in the other options, I can:
- Change the title of the widget
- Set the default view to be a list – which is useful when you have long filenames. It’s worth mentioning that Users can switch between icon and list view, but this option sets how the files display on loading.
- Allow Open in FrogDrive turns on the ability to open the shared folder outside the site.
Files: Office 365
Office 365 documents can be accessed via FrogDrive and embedded with Frog sites.
Accessing OneDrive in FrogDrive
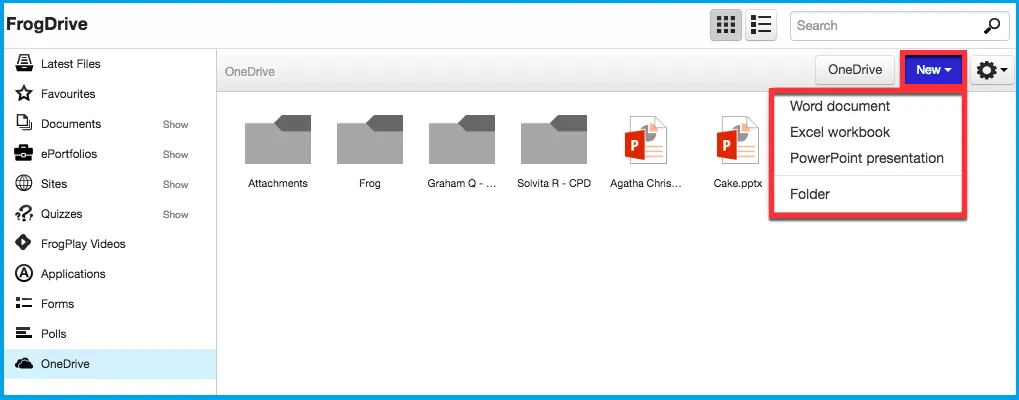
When you navigate to the FrogDrive, a pop up window may appear asking you to disable your pop up blocker depending on what browser you are using. You will need to disable the pop up blocker and then click confirm. A Microsoft pop-up window to appear asking you to enter your office 365 username/email address. You need to follow the rest of the instructions and ensure you click accept when asked for permission for OneDrive and FrogLearn to communicate. The OneDrive option will be displayed in the menu on the left within FrogDrive and is a direct window into your OneDrive folders and files. You can create new documents from within here by clicking on the New drop down menu button.
Adding OneDrive documents to a Frog site
Files: Google Drive
Using Frog and Google together
Google’s suite of tools offers a very useful resource to teachers and their students. Allowing students to receive work from teachers, adapt documents and hand them back.
Due to the nature of Google’s system, each teacher is responsible for setting up their own classes of students. Adding students via invitation to the class’s group. Your school IT administrators can use workarounds to do this or you could just let Frog manage all your groups for you.
Frog links to your MIS, so all your students and their classes exist ready to be assigned work. Any class changes are synced daily, so there’s no need to update groups. You still get to use all of those powerful Google tools, but Frog handles the admin.
And because you’ll be assigning using Frog’s homework system, parents and pastoral staff can help support your students with their Google homework. Which also means that any home learning set on Frog sends the student and their parents a Push Notification direct to their phone.
If you do use Frog for all your home learning assignments, then you’re not limited to just using documents, remember all of Frog’s self-marking quizzes, custom mark schemes and media-rich interactive content.
So, what does setting a Google homework in Frog look like?
As you can see here, I have my Google Drive as part of my FrogDrive. I can open the Drive from this link, or I can make new Google files directly from this New button.
I have a document here I’m ready to assign. I can preview it, to make sure it’s the right one and if I need to I can make a change to it by opening it in its own tab.
When I return to Frog, notice that the preview has also updated. If I close the preview for now, the document is still selected, so I can:
- Click on the Action Cog
- Select the Assign submenu
- And now I get to choose how I assign this document
- View only – shares this document with the students, although they can only view it, not interact with it
- Collaborate – also shares the same document, but this time they can amend it. or I can choose:
- Individual copy – this option duplicates the document for each student and shares them individually. This is probably the one you’ll use the most.
When I select whichever option, the regular New Assignment Wizard pops up. Here I can fill out the usual information and assign it to the class. My students get the same experience as any homework.
You can also assign Google docs directly from the New Assignment Wizard as well:
- Click on the big + (Plus) sign in the FrogBar
- Select Assignment
- In the New Assignment pop-up, fill out the front page as usual, then click Next
- On the Activities screen, you can now select Google Activity
- Browse FrogDrive to select the document you wish to add.
You can add multiple activities of course and mark each one separately and of course you can add additional resources.
Hopefully you can see that we have done our best to make assigning Google Docs as simple and straight-forward as possible, while also benefitting everyone else in school through a single, unified homework system.
There is a more in-depth look at setting and marking Google documents, which you can find linked below and we have detailed guides for your school’s Frog Admins to use when setting up initial integration. Our Service Desk can also help guide you through this.
Using Google and Frog - Frog Community