 Apprenticeships
 Construction
 Education Tech
 Engineering
 Franchise Networks
 Legal Firms
 Logistics
 MATs
MATs Recruitment
 Retail
 Seasonal Staff
FrogLMS Community
Optimising Images for Web
The aim of this site is to introduce optimising images for web. A quick guide to getting the best results in FrogLMS.
- Optimising Images Overview – Introduce options for displaying images in sites
- Adobe Photoshop – Guidance to getting the best results using Adobe Photoshop
- Corel PaintShop Pro – Guidance to getting the best results using Corel PaintShop Pro
- Pixlr Editor – Guidance to getting the best results using Pixlr Editor
- Tips and Suggestions – Guidance to getting the best results


Optimising Images: Overview
Frog has quite a few options for displaying images in sites, you can use the media widget, text widget, site timeline, image carousel and photo stream. So plenty of opportunities to include your own pictures, but equally plenty of opportunities to cause issues on the platform.
Cameras take BIG pictures
Digital cameras and smart phones manufacturers are constantly improving their cameras and routinely increasing resolution of images. A typical photo from a current smart phone camera will be around 6000 pixels wide by 4000 pixels high. This picture will also by around 12 Mb in size!
To put that in perspective, take a look at this table:
| Device | Width (px) | Height (px) |
|---|---|---|
| Smart phone camera photo | 6000 | 4000 |
| HD Desktop monitor | 1920 | 1080 |
| Typical Chromebook | 1366 | 768 |
| iPad Pro 9.7 & Mini | 2048 | 1536 |
Hopefully you agree that unedited digital images for use on screens is overkill.
File size comparison
If those figures are meaningless, take a look at this screenshot of two images I prepared for this tutorial:

The original image is 6000 pixels wide, the edited one is 500 pixels and is about 0.6% of the file size.
Why does this matter?
The bigger the image on the website the more data the browser has to download. Mobile browsers are low powered compared to desktops and WiFI is slower than a cable connection. It might not feel the case when you're creating content, but if your site is being viewed by 30 students at once, they are going to see any website (not just Frog) slow down.
Picture size
Halving an image's width will drop its file size down by at least 75%, but probably more as most image editing programs have image optimisation built-in.
| Original image | |
| Image with half width and height |
DPI
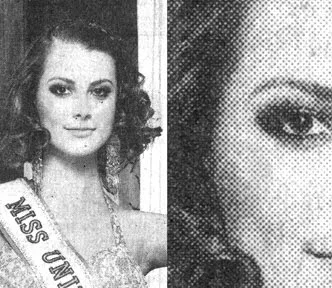
Dots-per-inch can be thought of as how dense images are. Newspapers famously have a very low DPI which makes the individual dots visible to the naked eye.
Printing expects a minimum of 300 dpi, with 600 dpi being more common.
Images for digital screens should be 72 or 92 dpi.
How Frog can help
Have a look on the sections below on how to save images for web using the most popular software and a free online option*. Each section shows you how to reduce the picture size and save for use online.
* As with all advice on third-party products, Frog cannot take responsibility for changes they make.
Optimising Images: Adobe Photoshop
To reduce the size and DPI of an image in Photoshop:
- Click on Image in the top menu
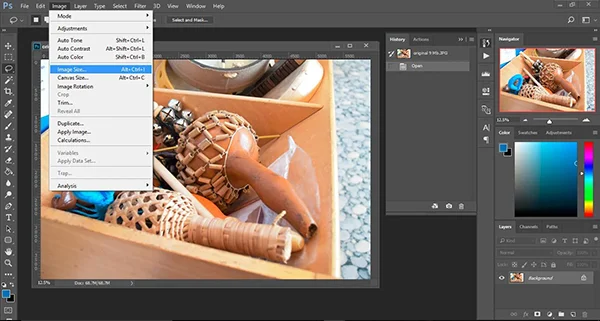
- In the dropdown menu, choose Image Size...
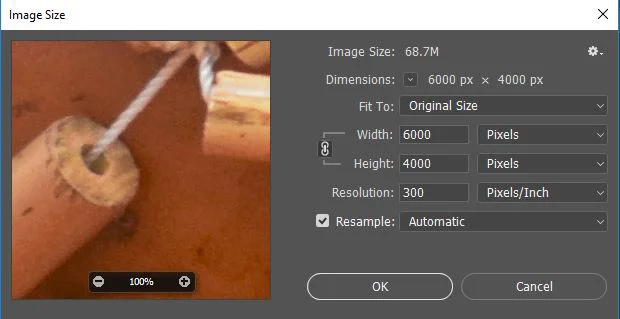
- Reduce the Resolution to 72
- The width and height will reduce automatically, if the width is still above 1000, bring this down to 1000 Pixels
- Click OK
- The pop up will disappear and the image will be much smaller on your screen. If you have the navigator open you will see your zoom is much less than 100%.
Saving
Before Creative Cloud, Adobe Photoshop had a Save for Web option (still available in CC under the Export settings or by using Shift + Ctr + Alt + S), CC does not require Save for Web and optimises all images on saving.
CC Users:
- Click Save As in the File menu
- Choose either JPG or PNG in the Save as type options
- Click Save
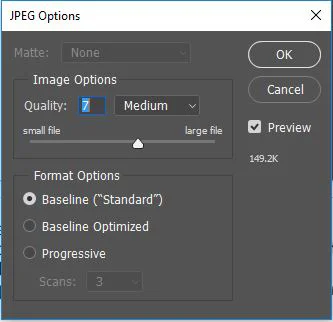
- Set your quality to around 7 (higher if you're not happy with the result)
- Click OK
Earlier Photoshop versions:
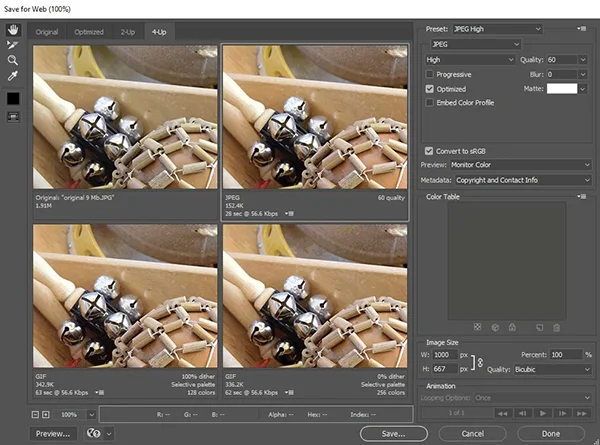
- Click Save for Web in the File menu
- Select the 4-Up tab - this shows you the image with 4 different quality options.
- Make sure the Preset is set up JPEG High
- Generally the top-right image is the preferable quality option. Click that to highlight it.
- Click Save...
Final result
Image size: 139 kb
1.5% file size of the original
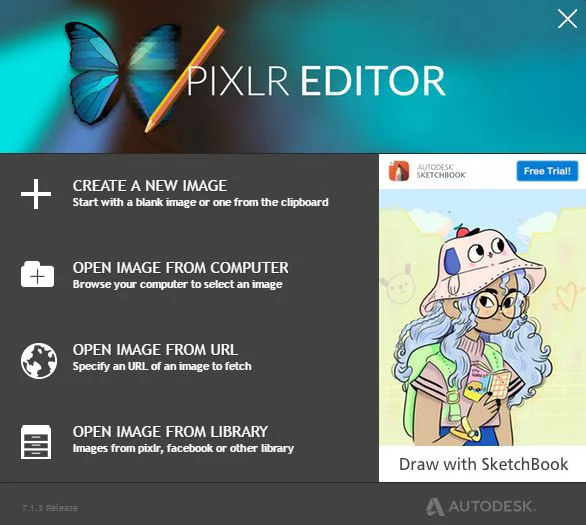
Optimising Images: Pixlr Editor
This is a currently free website from Autodesk which offers lots of tools for image editing
Pixlr is Flash-based. You may need to enable this in your browser. You can find instructions here:
https://helpx.adobe.com/flash-player/kb/enabling-flash-player-chrome.html
- Import your image into Pixlr from the opening screen, OPEN IMAGE FROM COMPUTER
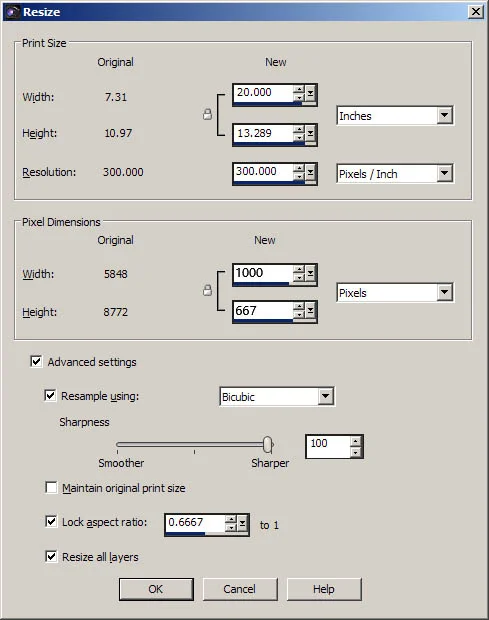
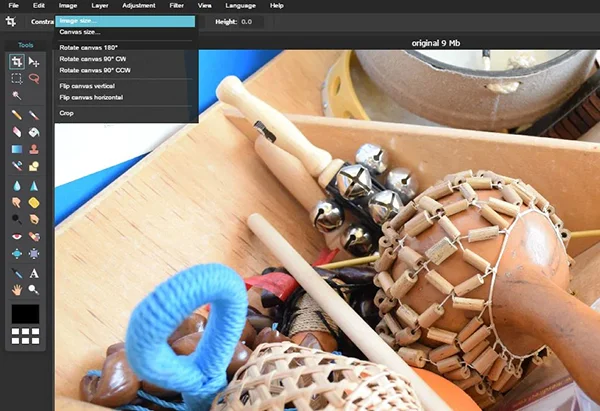
- From the Image menu, choose Image Size...
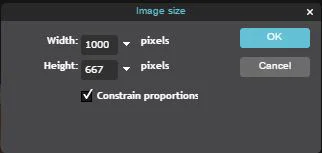
- In the pop up, type 1000 in the width box
- Click OK
- The image reduces in size and is now ready to save
- In the File menu, choose Save
- In the new pop up, make sure My Computer is highlighted, JPEG and 80 quality is fine
- Click OK to save you image
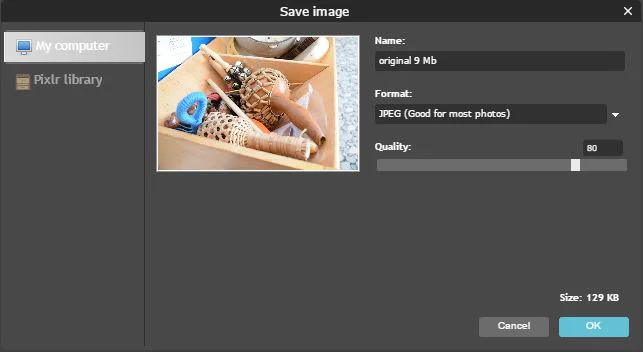
Final result
Image size:130 Kb
1.4% file size of original
Optimising Images: Tips and Suggestions
Avoid pasting images into the text widget
It seems like an easy option to copy and image and paste it into the text widget, but if you do this you convert the image to the largest image format (bitmap) and it will take your site a long time to load.
In both MS Word and PowerPoint, you can right-click and save individual images.
Offer to convert images for your teachers
Did you know Photoshop can batch convert images. If you can encourage your staff to drop their images into a shared folder, you can set Photoshop running to convert en-masse:
Include a Module on image optimisation
Include a section about how to use image editing software.