 Apprenticeships
 Construction
 Education Tech
 Engineering
 Franchise Networks
 Legal Firms
 Logistics
 MATs
MATs Recruitment
 Retail
 Seasonal Staff
FrogLMS Community
Back to Widget Guides
Report
![]()
The aim of this guide is to introduce Administrators to the Report Widget in FrogLMS.
Click on the link below to download pdf version of the Report Widget Guide:
Courses 22_1_57 | Release Notes - Report Widget
This guide will help you with:
- Report Widget Overview - What is a Report Widget
- How-to - The process of embedding a saved report
- Reporting Application - launching the Reporting application with report details

Report Widget: How-to
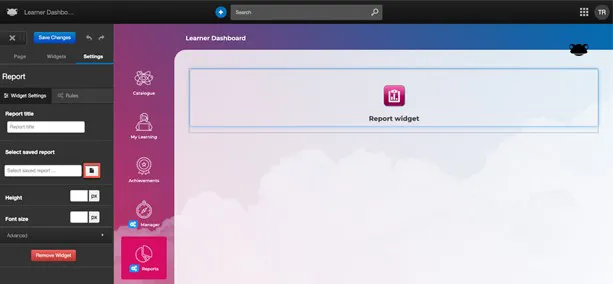
As an administrator, navigate to the page where you want to add the Report widget. Enter edit mode, then go to Widgets > Insert, where you will find the new Report widget.
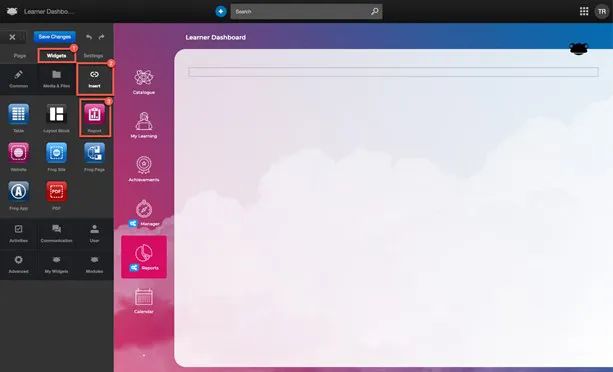
Drag the Report widget onto the page, then click on it to display the widget settings.

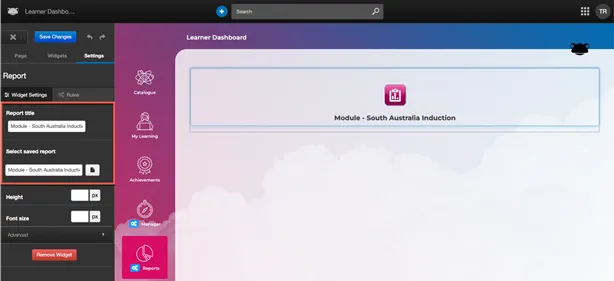
The first step is to choose the saved report you want to display to managers. Click on the file icon next to the field Select saved report click on the file icon....
A pop-up window listing all saved reports will appear.
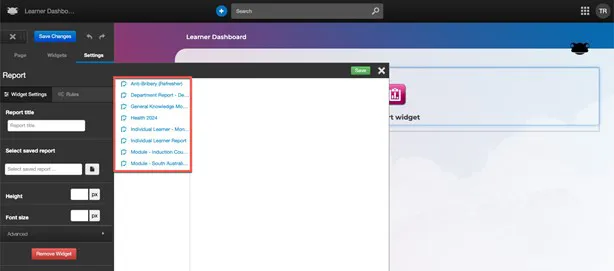
Select one of the saved reports to display all its parameters in the window on the right. If you wish to change any parameters, do so here before saving your changes.
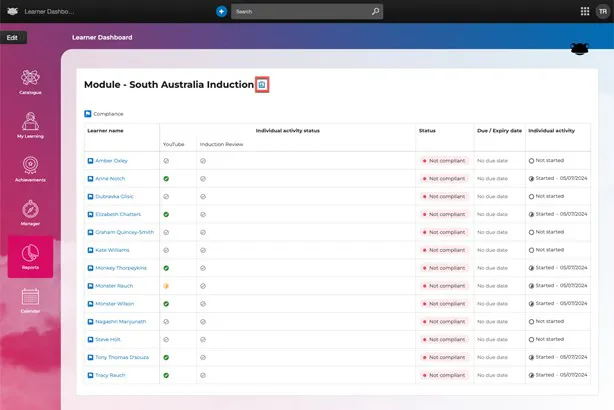
In this example, the saved report titled Module – South Australia Induction has been selected, displaying all the associated report parameters.
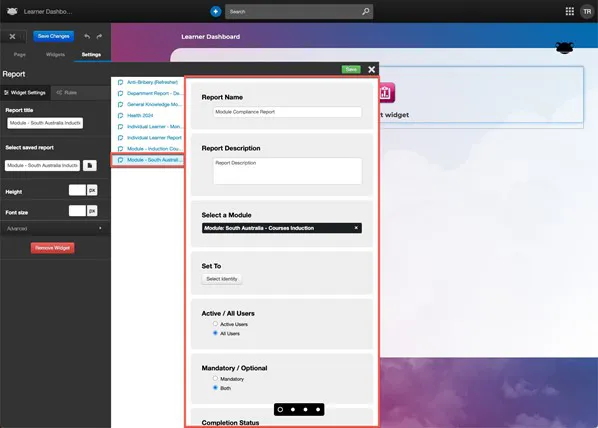
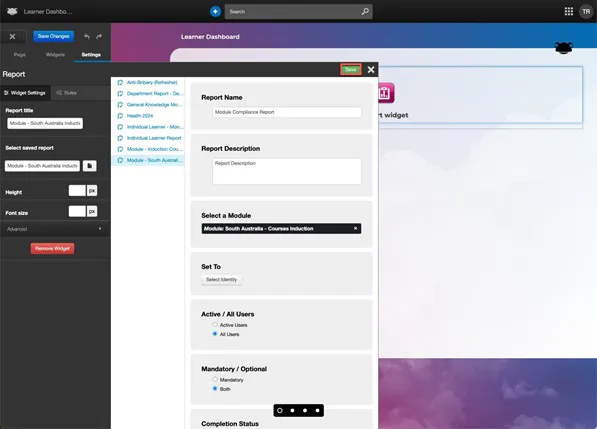
When happy with the report parameters click the Save button.
You will be returned to the Report widget settings, where you will see that the following fields are now populated with the saved report name, Module – South Australia Induction:
- Report title
- Select saved report
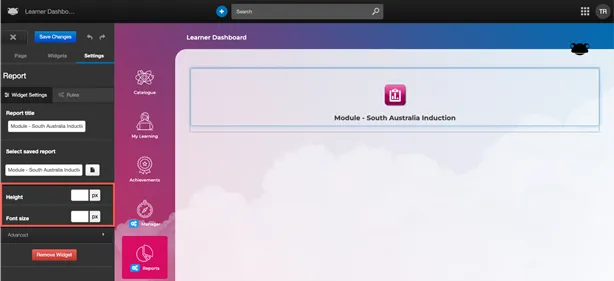
There are a few additional settings within the Report widget, including:
- Height – Set the widget's height in pixels. By default, this field is blank, resulting in a widget height of 750 pixels.
- Font size – Set the font size displayed within the widget. By default, this is set to 13 pixels.
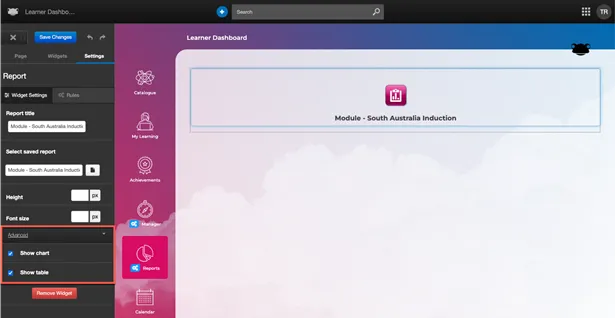
If we select the > for Advanced, two additional options appear, both selected by default:
- Show chart
- Show table
NOTE:
Some reports contain both a chart and a table (e.g., Department Compliance Report, Manager Compliance Report). Therefore, the options above provide flexibility in choosing which elements of the report to display.
When happy with your changes, select the Save Changes button and exit edit mode.
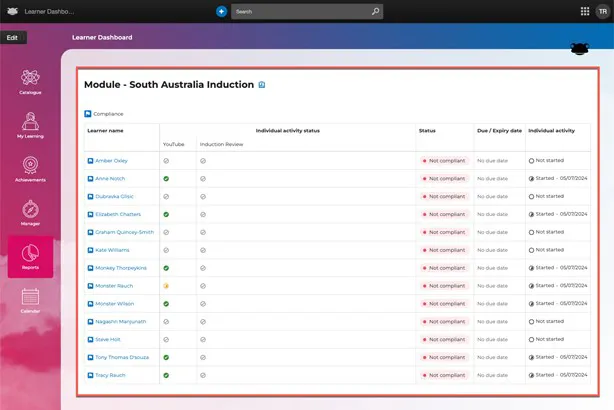
The Report widget will now display the selected report, which in this example is Module - South Australia Induction.
NOTE:
The data within the Report widget will be filtered to show only the learners managed by the logged-in user.
Report Widget: Reporting Application
Within the displayed report, any links will open the Reporting application and show relevant content.
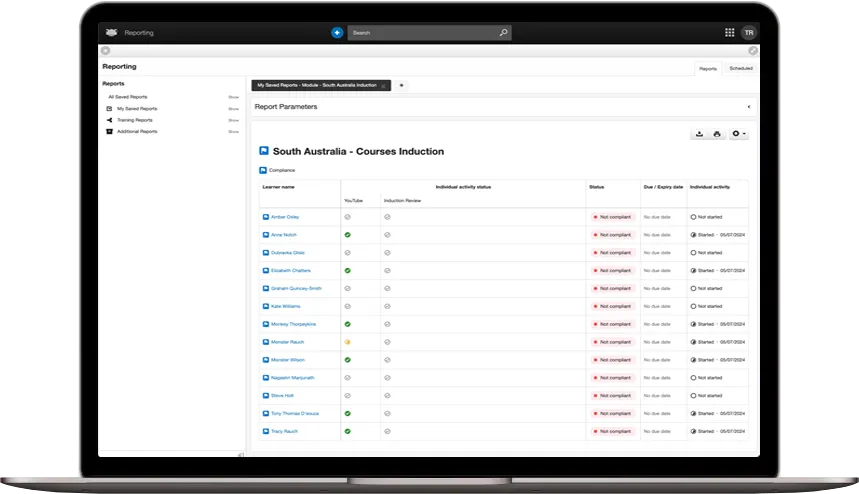
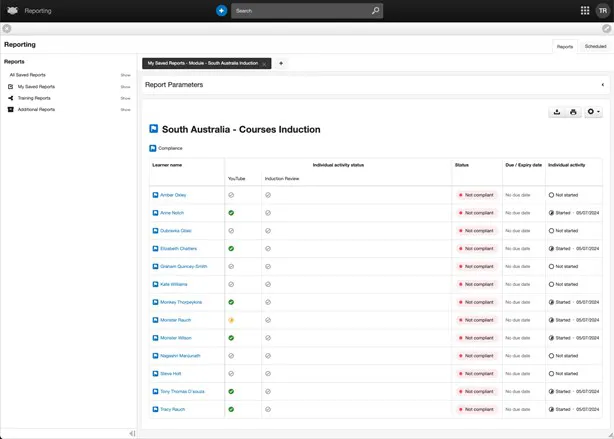
For example, in the Module – South Australia Induction report, selecting the report icon next to the title will launch the Reporting application with the selected report details automatically displayed.
Below is the view after selecting the report icon in the previous step. We can see that the Reporting application has been launched with all the parameters of the saved report.
Navigating back to the Report widget, we mentioned previously that any links will open the Reporting application and show relevant content.
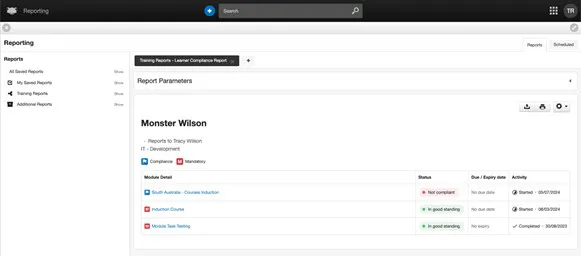
For instance, in the Module – South Australia Induction report, selecting the name of an individual learner, Monster Wilson, will open the Reporting application, displaying all modules assigned to this learner and their current status.
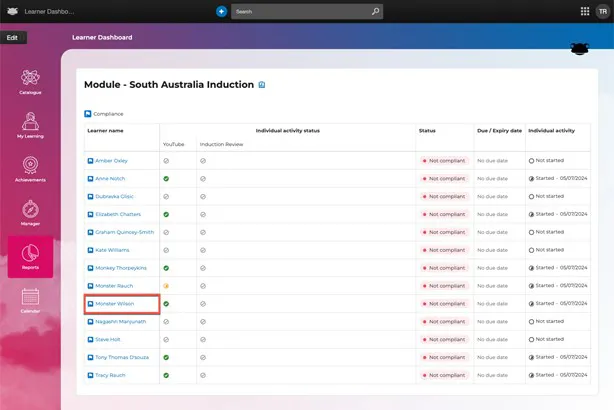
Below is the view after selecting the learner in the previous step. The Reporting application has launched, displaying all modules assigned to Monster Wilson and their current status.