 Apprenticeships
 Construction
 Education Tech
 Engineering
 Franchise Networks
 Legal Firms
 Logistics
 MATs
MATs Recruitment
 Retail
 Seasonal Staff
FrogLMS Community
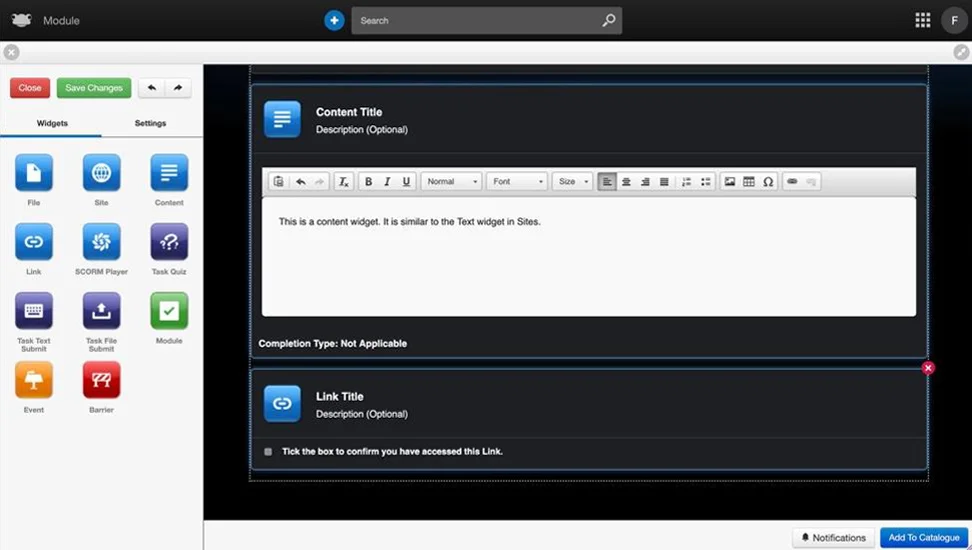
Module Widgets
There is a selection of widgets in left navigation panel that can be added to training modules:
- File – Allows you to upload a document (Word, PowerPoint, PDF, etc.)
- Site – Allows you to add a Frog Site
- Content – Add text, paragraphs, tables and media
- Link – Add an external link (external websites) or internal link to a document in FrogDrive.
- Scorm Player – Add SCORM type content
- Task Quiz – Add an assessment quiz
- Task Text Submit – Add a task for the learner to submit text answer
- Task File Submit – Add a task for the learner to upload a file
- Module – Add another module to this module. This will create a module with submodules
- Event – Create physical events / workshops that are associated with this training module/programme
- Barrier – This widget is added as separators to prevent a learner from skipping or moving to the next section of the training until the previous sections/activities have been completed
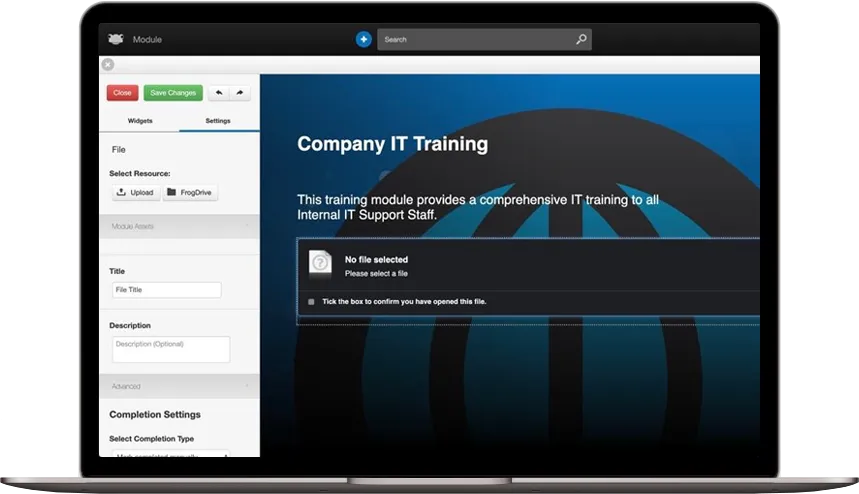

Module Widgets: File Widget
The File widget gives you a method of providing a video, PowerPoint, PDF or any other type of file and provides a Completion type.
Enter the title or file name and description for the document.
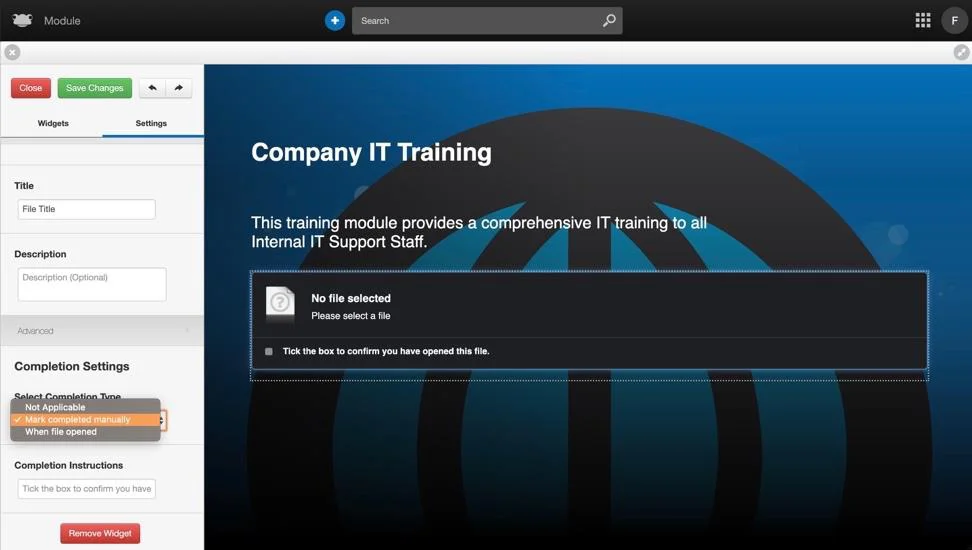
You can also set completion rules:
- Mark completed manually – the learner will indicate that he has open and read the file and document.
- When file opened – this activity will be automatically marked as completed by the learner when the file is opened.
Within the Advanced section, there are two options:
- Preview - will open the document (if web compatible) in a new tab
- Force Download - will trigger the browser's download / save file system
Module Widgets: Site Widget
A Site is a self-contained space within FrogLMS which can be used to present information alongside interactive tools. Sites can contain multiple pages, videos, quizzes, questions, image hotspots, links to other files and many other options. Sites can be thought of as a cross between a PowerPoint and a website.
While Sites can have multiple pages, they can be placed into Presentation Mode, which hides the page menu and replaces it with Next and Back buttons – which keep track of a Learner’s journey through the site. When a Site is in Presentation Mode and the Learner reaches the last page, the Next button becomes a Finish button. Clicking that records the Learner has finished the presentation.
To add a Site widget to the module, drag the widget from the left navigation panel (under the Widgets section) to the body of the module. Once added to the module, click on the added widget to reveal widget settings on the left navigation panel.
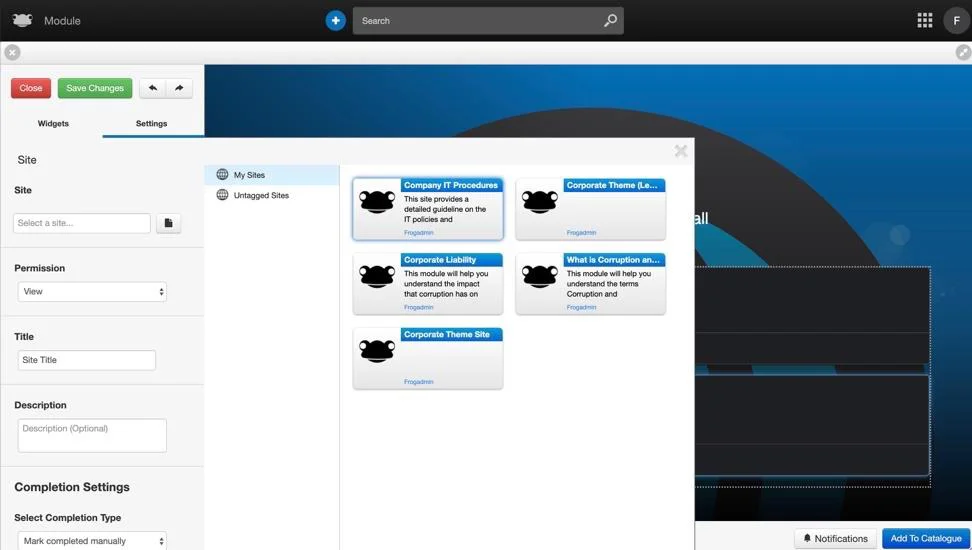
You can search for a file by entering a keyword in the Select a site… textbox, or click on the button with file icon to select a site from FrogDrive.
Once the site is added, the title will be auto-populated with the site name. You can add a description for the site – this will be displayed in the training module as shown in the screen capture.
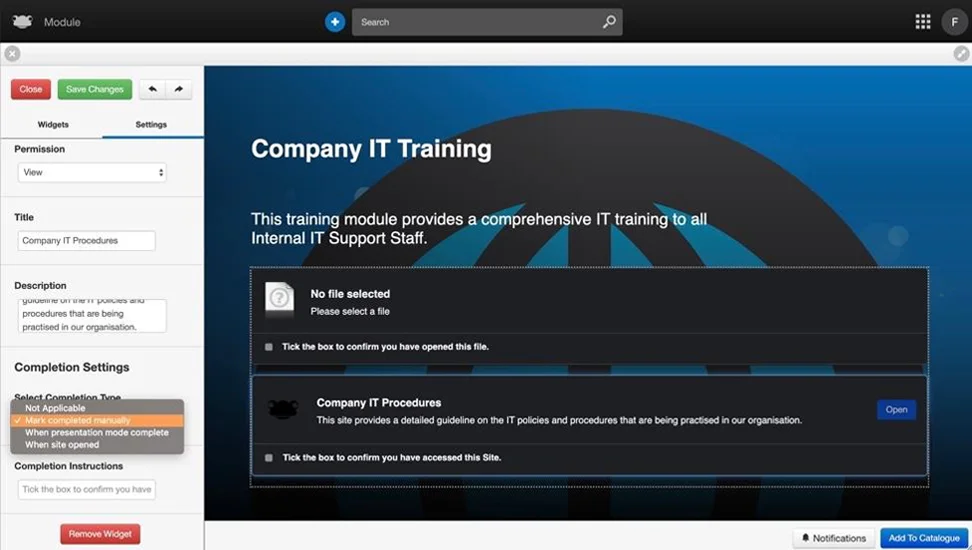
The completion statuses are:
- Mark completed manually – the learner will indicate that he has open the site.
- When presentation mode complete – sites can be presented in presentation mode, when the learner has read all the slides in the presentation, the activity is complete.
- When site opened – this activity will be automatically marked as completed by the learner when the file is opened.
Module Widgets: Content Widget
The content widget provides a space for you to include text instructions or pictures. Sometimes you just need to provide more or different information that the description, yet you do not want to create an entire Site for a few paragraphs.
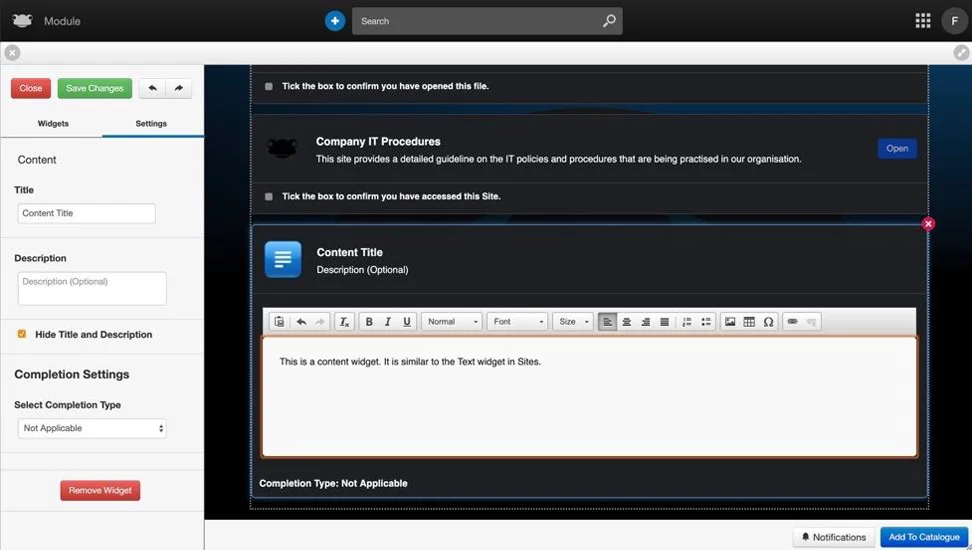
Once added to the module, you can use the text editor to enter text, add an image, equations or links. Note, links made in the Content widget cannot be tracked for completion status.
On the left navigation panel, you can add a title and description for the content section that you have just created. Otherwise, you can choose to hide both the title and the description.
Module Widgets: Link Widget
Link widgets can be used to provide Learners with information external to FrogLMS. This can be anything that provides a web link, such as a:
- A website or specific page on a website
- Direct access to a document on a web site
- Streaming video.
When linking to an external source of information, one that you do not control, it is worth monitoring the link regularly. Websites can be updated and links cease working or have their information changed. It is also worth noting that some cloud-document services like Microsoft OneDrive include time-limits on shared links. These links may expire and you may need to create new sharing links.
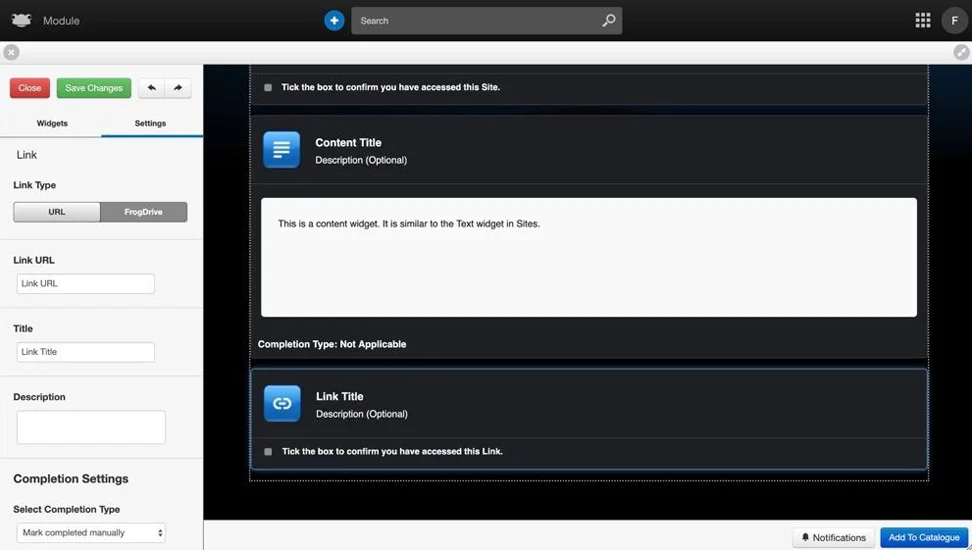
You can toggle between adding an external link (external website) or a link to a document in FrogDrive under the Link Type section.
Fill in the website URL in the Link URL field.
You can also add a title and description for the link.
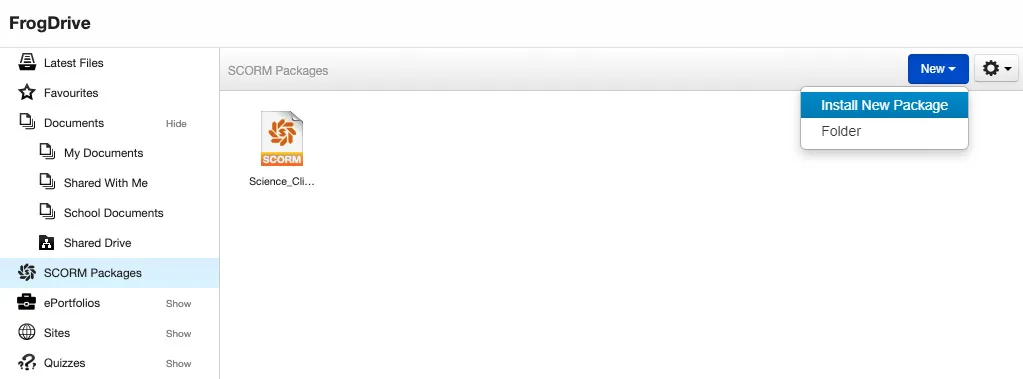
Module Widgets: SCORM Player Widget
The SCORM widget provides you with the ability to display a package as part of a Module's content.
In order to use a SCORM package it first needs to be installed by an Administrator - this is done within FrogDrive. Once installed, the widget allows you to select the SCORM package.
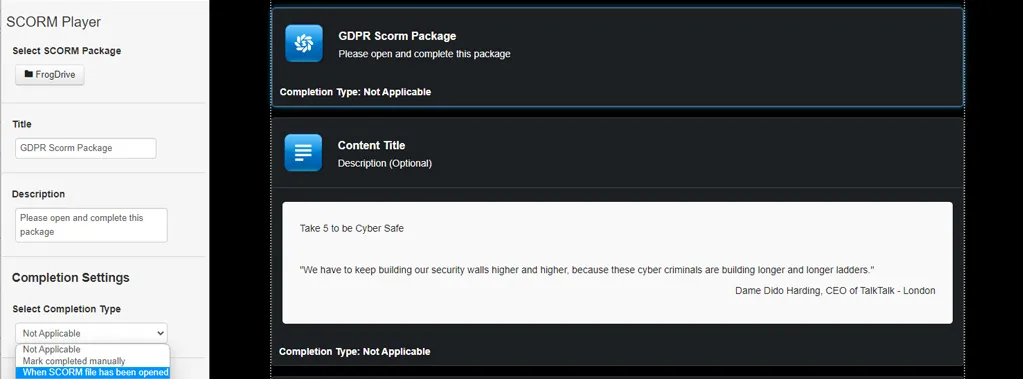
SCORM widget completion settings:
- Not applicable – the SCORM package is optional to the learner.
- Mark completed manually – user can manually mark SCORM as completed.
- When SCORM has been opened – the SCORM package is marked as complete once it has been opened.
- Score greater than passmark - the SCORM package is marked as complete only if the score gained on completion is greater than a defined passmark.
Technical information regarding the use of SCORM packages:
- SCORM (Shareable Content Object Reference Model) was first introduced in 2000 and updated in 2004.
- SCORM packages uploaded to the Frog platform should support as a minimum requirement “SCORM 2004”
- Please Note: Some SCORM packages are flash based and many modern browsers may not support the use of flash. Therefore, should you find that a SCORM package will not play, Frog recommends checking if the browser you are utilising supports flash.
- Due to variability in how the SCORM was built, especially older packages, Frog can not guarantee the visual display of SCORM content on devices, especially those with a smaller screen such as mobile devices.
- For any SCORM packages uploaded to the Frog platform, there is a maximum upload size of 1GB.
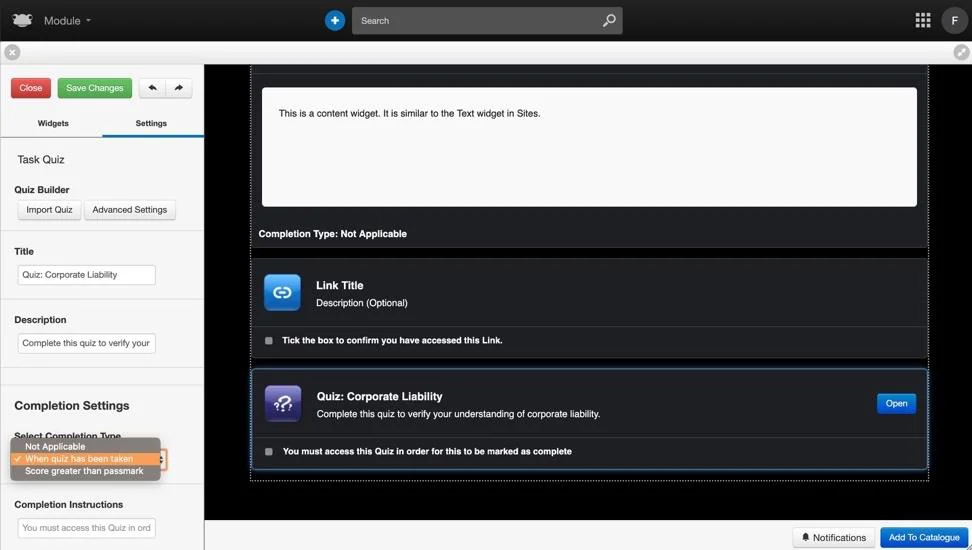
Module Widgets: Task Quiz Widget
FrogLMS contains a self-marking quiz system, with multiple question types. Learners work through a quiz, seeing their marking as they progress. Questions and answered are presented in a randomised order. You can set a pass threshold in the completion settings, which can prevent the Learner progressing until they have met the threshold.
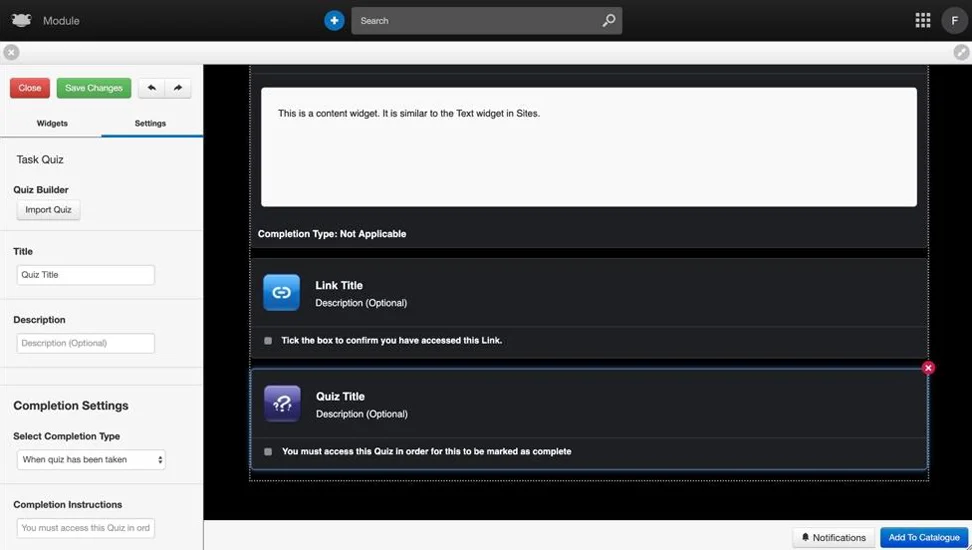
To add a quiz to the training module, click on Import Quiz button on the left navigation panel. FrogDrive window will be displayed with a list of available quizzes.
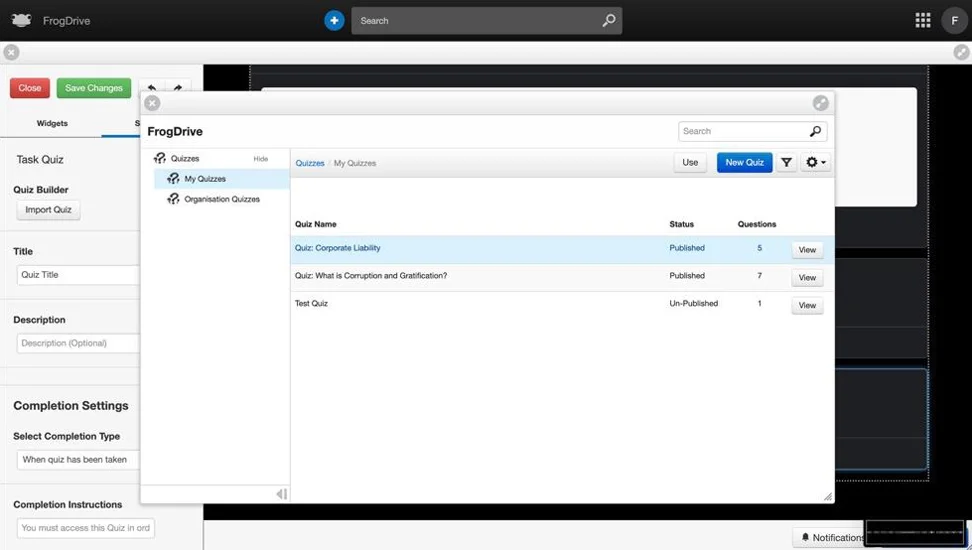
Click on a quiz to select the quiz that you want to add, then click on the Use button.
Quiz widget completion settings:
- Not applicable – the quiz is optional to the learner.
- When quiz has been taken – as long as the learner has attempted the quiz, the activity will be considered as complete.
- Score greater than passmark – the learner is required to obtain a minimum score to complete the training.
When ‘Score greater than passmark’ is selected as the completion type, you will need to set a minimum score (Pass percentage) that the learner needs to obtain in order to pass the quiz and training.
Module Widgets: Task Text Submit Widget
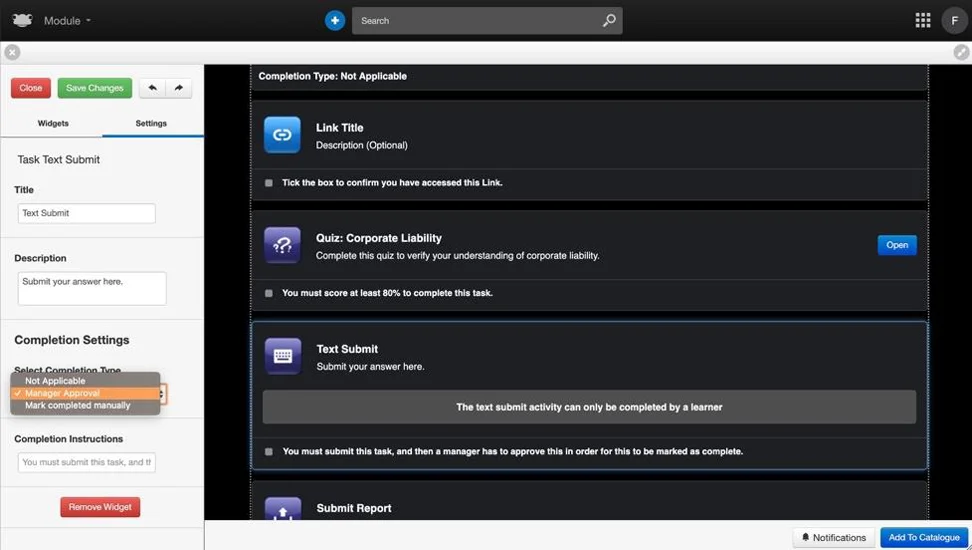
You can add a title and description for the Text Submit activity. Learners complete the Task by typing directly into the page. They can then submit their answer, which will notify their manager. If you wish to collect answers centrally, you should not use this widget and instead use a Form on a site.
Completion settings:
- Not applicable – the quiz is optional to the learner.
- Manager Approval – the manager of the learner will get a notification to review the submitted text answer and approve/reject for the activity to be marked as complete.
- Mark completed manually – the learner will indicate manually that they have completed the activity.
Module Widgets: Task File Submit Widget
Learners can use this widget to pass files to their manager on the course. Standard web file types are able to be uploaded, but you can use the File Types option in System Preferences to add additional file types. Files are virus-scanned during the upload process.
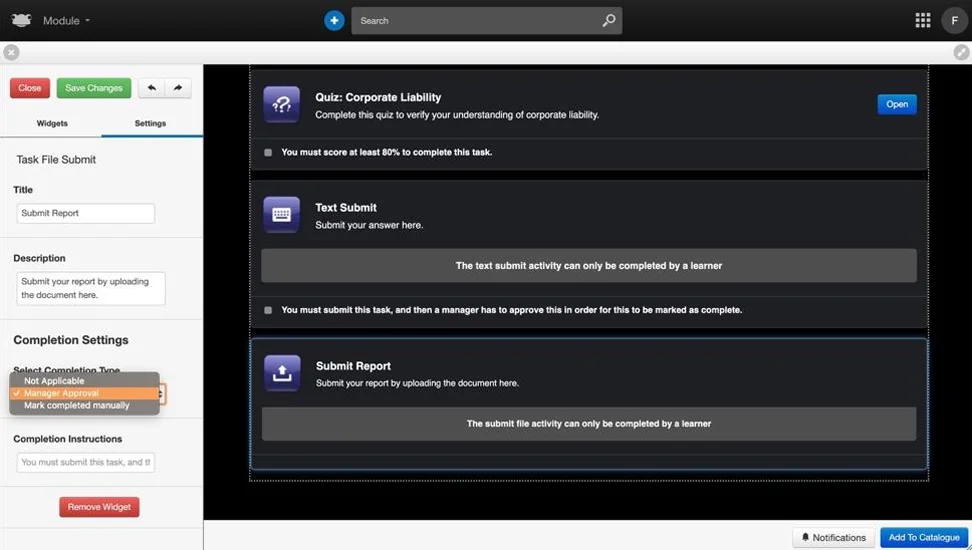
Completion Settings:
- Not applicable – the quiz is optional to the learner.
- Manager Approval – the manager of the learner will get a notification to review the submitted text answer and approve for the activity to be marked as complete.
- Mark completed manually – the learner will indicate manually that they have completed the activity.
Module Widgets: Module Widget
To add a Module widget to the module, drag the widget from the left navigation panel (under the Widgets section) to the body of the module. Once added to the module, click on the added widget to reveal widget settings on the left navigation panel.
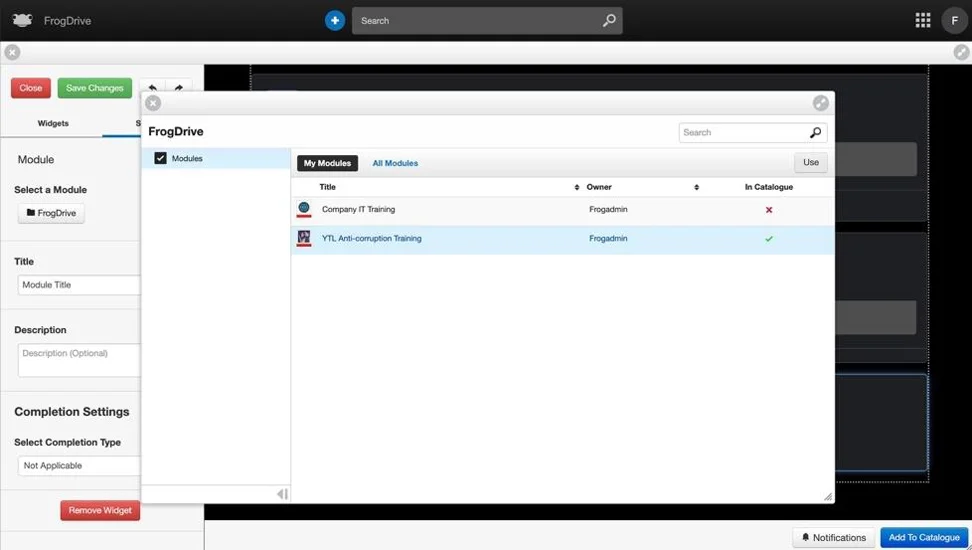
Click on the FrogDrive button. The FrogDrive window will be displayed.
Click on the module that you wish to add, then click Use. This will add the module.
The name of the module will appear as the Module title, and you can also add a meaningful description for the module.
Completion Settings:
- Not applicable – This turns the module widget into a link to the other module.
- When module completed – the Learner must complete the entire linked module, for this widget to be regarded as completed. Module links mean you can provide training routes through different modules as well as track Learners on their overall progress towards a specific goal.
Module Widgets: Event Widget
Events are live training opportunities which Learners can book themselves onto.
Each “event widget” provides a space for multiple live sessions (either in-person or online). If you have 4 workshops per year covering the same topic, you will only require 1 event widget. If you have 4 workshops on the same day, covering different topics, you will need 4 event widgets. A workshop which runs the first Monday of every month will require 1 event widget.
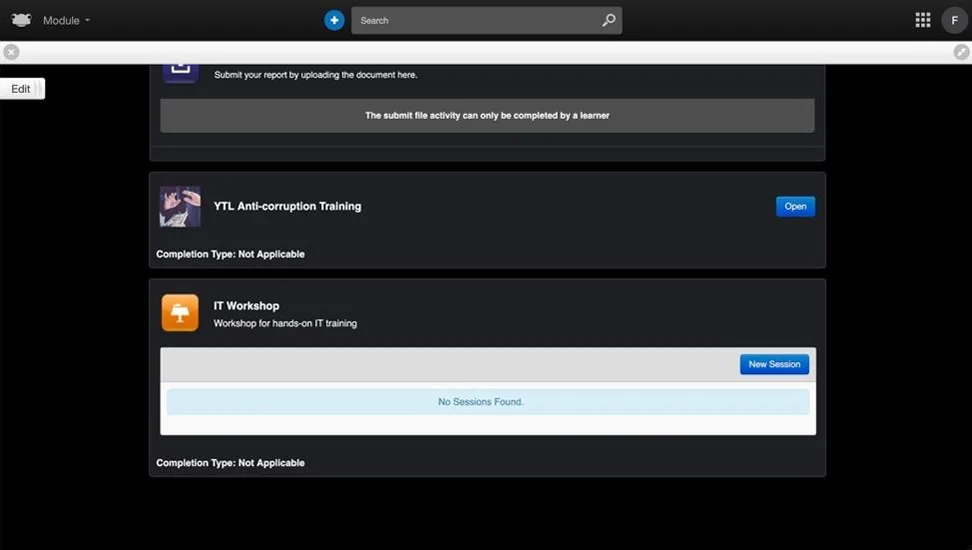
To add an Event Widget to the module, drag the widget from the left navigation panel (under the Widgets section) to the body of the module.
Once added to the module, click on the added widget to reveal widget settings on the left navigation panel. At this point you can add the Event’s name and description, but to add the workshop’s dates, times and other details, you need to click on Save Changes and close the Edit mode by clicking on the Close button.

Click on the New Session button and a pop-up window will be displayed.
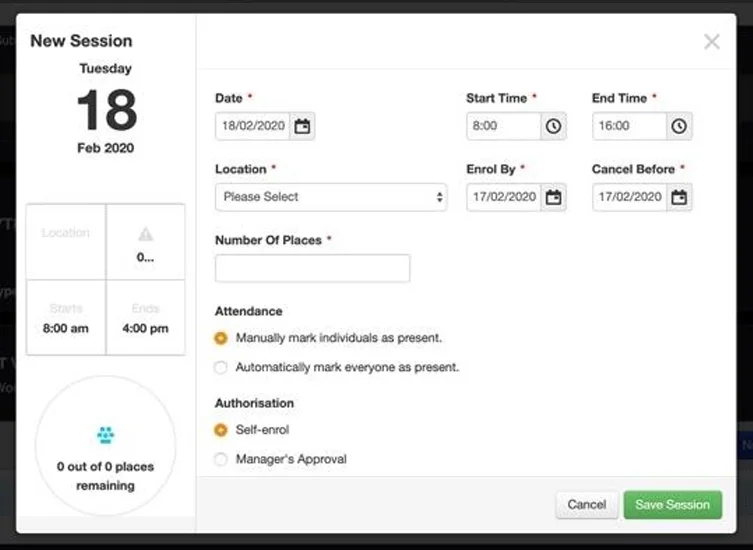
On the pop-up, you can set the following:
1. Date of training
2. Start / End Time
3. Location of Training
4. Enrol by (date)
5. Cancel before (date)
6. Number of places (seats)
7. Attendance marking mode (Manual/Automatic)
8. Authorisation (Self-enrol/Manager’s Approval)
When Manager’s Approval is selection managers will be emailed when one of their Learners chooses that event. They can then approve or reject the booking. Learners will be notified by email.
Once the details have been set for the event, click Save Session to finish. You can then add additional sessions.
Completion Settings:
- Not applicable – the event is optional
- When the session is attended – the Event widget also acts as a register, so that an Admin profile can check off attendance if Attendance marking mode is set to manual. Automatic assumes the Learner attended the workshop.
Module Widgets: Barrier Widget
Barrier widgets prevent progress for the Learner until the activity completion status above it have been completed.
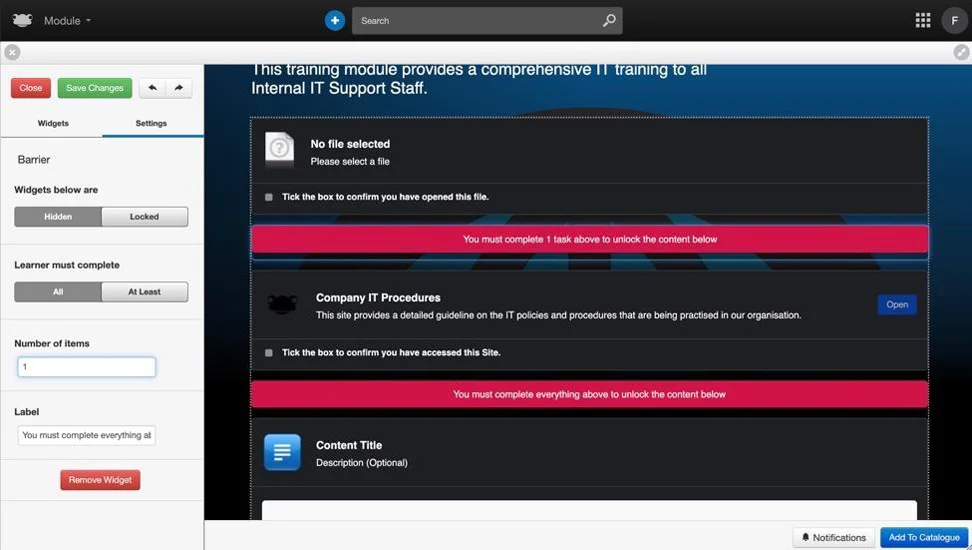
On the left navigation panel, you can set if you want the activities in the later part of the training module are hidden or locked if the learner has not completed the previous activities.
You can set whether the learner needs to complete all or a pre-determined number of previous activities for the later activities in the module to be unlocked.
Both settings above are easily configured by clicking on the toggle buttons.